Tutorial Debian 10 : Cara Instalasi phpMyAdmin dan Maria DB Server Menggunakan Nginx Web Server

phpMyadmin merupakan salah satu perangkat lunak berbasis web yang digunakan untuk memudahkan dalam administrasi database mysql dan mariadb seperti membuat dan menghapus database, membuat table, dan operasi lain yang berkaitan dengan database mysql atau mariadb. Pada kesempatan ini saya akan memberikan tutorial bagaimana menginstall phpmyadmin dan maridb server pada Debian 10, yang tentunya menggunakan nginx web server.
# lsb_release -a
No LSB modules are available.
Distributor ID:	Debian
Description:	Debian GNU/Linux 10 (buster)
Release:	10
Codename:	buster
1. Sudah Menginstall Web Server
Hal pertama yang harus disiapkan adalah kalian harus sudah menyiapkan web server untuk menginstall phpmyadmin. Pada tutorial ini kita akan menggunakan Nginx sebagai web servernya dan juga sudah bisa menjalankan PHP yang tentunya pada tutorial sebelumnya saya sudah membahasnya.
2. Update & Upgrade
Update terlebih dahulu repository kalian dengan perintah apt update atau jika pada mode user maka jangan lupa tambahkan sudo pada setiap perintah sudo apt update, kemudian upgrade Debian kalian dengan perintah apt upgrade atau kalian dapat menggabungkan kedua perintah tersebut apt update && apt upgrade. Jika kalian menggunakan repository online maka pastikan internet kamu stabil dan lancar kalian dapat mengujinya menggunakan untilitas ping.
3. Instalasi MariaDB-Server
Untuk menginstall mariadb-server sangatlah mudah cukup dengan mengetikan apt install mariadb-server.
Setelah instalasi selesai sekarang kita akan memberikan password root untuk mariadb-server karena secara default mariadb tidak memiliki password dan tentunya ini menjadikan database kita menjadi tidak aman.
Untuk meberikan password caranya cukup mudah hanya dengan perintah mysql_secure_installation. Dan pada New password: ketikan password kalian jika sudah tekan enter diline selanjutnya Re-enter new password: kalian diminta untuk memasukan konfirmasi password.
Instalasi dan konfigurasi password pada mariadb selesai. Maka kita dapat login menggunakan password yang telah kita buat tadi.
4. Instalasi phpMyadmin
Pada tahap ini pastikan lagi kalian sudah mengistall web server Nginx dan PHP. Jika belum maka kalian harus menginstallnya terlebih dahulu untuk lebih jelasnya kalian bisa menbaca postingan sebelumnya. Install dependensi yang diperlukan oleh phpmyadmin terlebih dahulu.
Di versi Debian sebelumnya kita bisa menginstall debian dengan cara mengetikan apt install phpmyadmin. Karena pada Debian 10 ini sudah tidak ada paket phpMyadmin lagi maka kita download installer phpmyadmin terlebih dahulu.
Setelah installer phpmyadmin_4.6.6-4_all.deb berhasil didownload maka saat nya kita untuk memulai instalasi paket. Caranya adalah dpkg -i phpmyadmin_4.6.6-4_all.deb .
Nah jika terjadi error seperti pada diatas maka tak usah panik itu disebabkan karena dependesi yang diperlukan untuk mengistall phpMyadmin masih kurang kita dapat memperbaikinya dengan cara apt install -f.
Jika sudah maka instalasi phpMyadmin akan dilanjutkan, pada Configure database for phpmyadmin with dbconfig-common? pilih Yes dengan mengggunakan tab untuk navigasi dan enter untuk memilih.
Package configuration

 ┌────────────────────────────────────────────────┤ Configuring phpmyadmin ├────────────────────────────────────────────────┐
 │                                                                                                                          │
 │ The phpmyadmin package must have a database installed and configured before it can be used. This can be optionally       │
 │ handled with dbconfig-common.                                                                                            │
 │                                                                                                                          │
 │ If you are an advanced database administrator and know that you want to perform this configuration manually, or if your  │
 │ database has already been installed and configured, you should refuse this option. Details on what needs to be done      │
 │ should most likely be provided in /usr/share/doc/phpmyadmin.                                                             │
 │                                                                                                                          │
 │ Otherwise, you should probably choose this option.                                                                       │
 │                                                                                                                          │
 │ Configure database for phpmyadmin with dbconfig-common?                                                                  │
 │                                                                                                                          │
 │                                    <Yes>                                       <No>                                      │
 │                                                                                                                          │
 └──────────────────────────────────────────────────────────────────────────────────────────────────────────────────────────┘
Kita diminta memasukan password MariaDB server kita. Maka masukan saja password nya kemudian jika sudah pilih Ok.
Package configuration

 ┌────────────────────────────────────────────────┤ Configuring phpmyadmin ├────────────────────────────────────────────────┐
 │ Please provide a password for phpmyadmin to register with the database server. If left blank, a random password will be  │
 │ generated.                                                                                                               │
 │                                                                                                                          │
 │ MySQL application password for phpmyadmin:                                                                               │
 │                                                                                                                          │
 │ ******__________________________________________________________________________________________________________________ │
 │                                                                                                                          │
 │                                   <Ok>                                       <Cancel>                                    │
 │                                                                                                                          │
 └──────────────────────────────────────────────────────────────────────────────────────────────────────────────────────────┘
Masukan konfirmasi password kalian, jika sudah tekan Ok.
Package configuration

                     ┌────┤ Configuring phpmyadmin ├─────┐
                     │                                   │
                     │                                   │
                     │ Password confirmation:            │
                     │                                   │
                     │ ******___________________________ │
                     │                                   │
                     │      <Ok>          <Cancel>       │
                     │                                   │
                     └───────────────────────────────────┘
Karena kita tidak menggunakan apache2 maupun lighttpd sebagai web server maka kita unchek saja menggunakan spasi jiki sudah pilih Ok.
Package configuration

  ┌────────────────────────┤ Configuring phpmyadmin ├─────────────────────────┐
  │ Please choose the web server that should be automatically configured to   │
  │ run phpMyAdmin.                                                           │
  │                                                                           │
  │ Web server to reconfigure automatically:                                  │
  │                                                                           │
  │    [ ] apache2                                                            │
  │    [ ] lighttpd                                                           │
  │                                                                           │
  │                                                                           │
  │                    <Ok>                        <Cancel>                   │
  │                                                                           │
  └───────────────────────────────────────────────────────────────────────────┘
2. Mengakses phpMyadmin
Untuk mengakses phpMyadmin kita cukup mengetikan http://ip-address-kamu/phpmyadmin atau jika kalian menginstall pada lokal komputer kalian http://localhost/phpmyadmin.

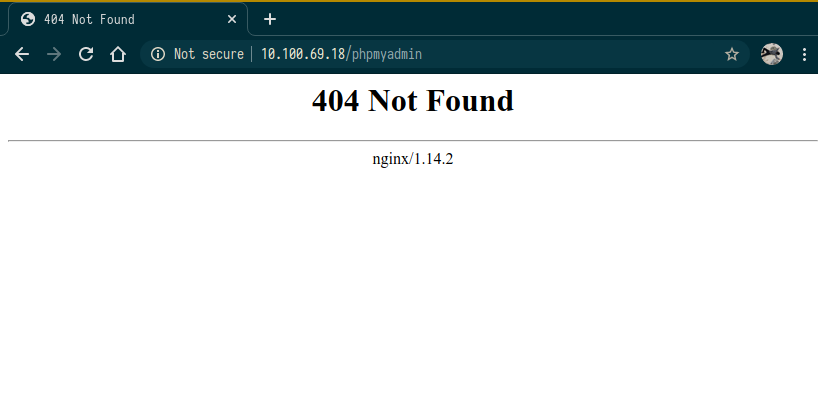
Mengapa Not Found ? Ini karena kita belum membuat symlink untuk phpMyadmin kita pada direktori /var/www/html. Mari kita buat dahulu.
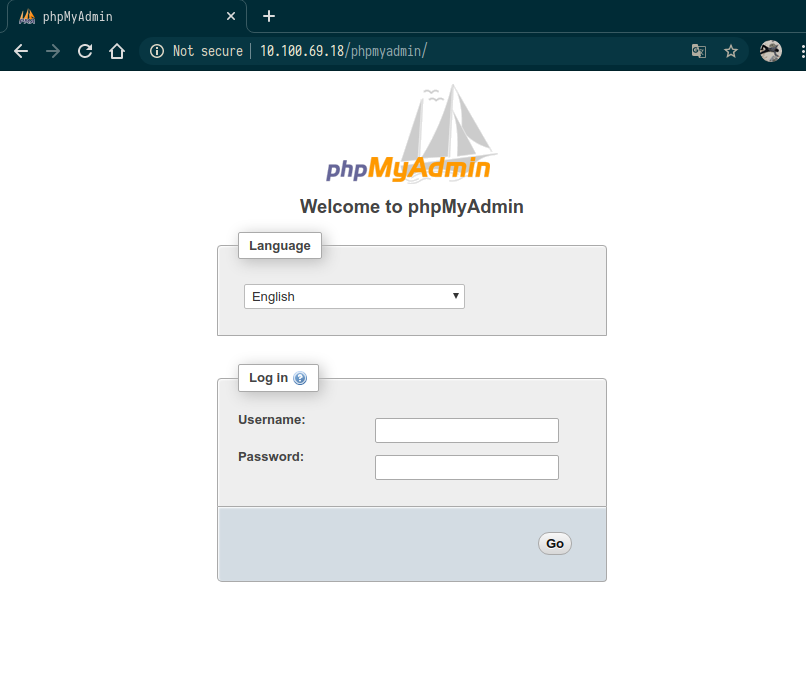
Setelah itu reload kembali. Maka halaman phpMyadmin akan terbuka kamu bisa login menggunakan username phpmyamdin dan password yang telah kamu buat tadi. Tetapi kamu tidak bisa membuat database. Mengapa? Karena status user kamu bukan merupakan superuser atau root.

2. Agar Bisa Login sebagai ROOT user
Untuk bisa login menggunakan superuser atau root maka kita bisa lakukan dengan cara mereconfigure phpmyadmin kita berikut caranya.
Pilih Ok.
Reinstall database for phpmyadmin? pilih Yes.
Pilih yang TCP/IP.
Pilih localhost.
Isikan Port default MariaDB yaitu 3306 kemudian Ok.
Biarkan default saja phpmyadmin lalu Ok.
Pilih Ok.
Edit username nya menjadi root@localhost.
Masukan password MariaDB kalian. Lalu Pilih Ok.
Masukkan Konfirmasi password. Lalu Pilih Ok.
Isikan root. Lalu Pilih Ok.
Tidak Perlu pilih Keduanya karena kita menggunakan web server Nginx. Lalu Pilih Ok.
Jika terjadi error jangan panik, memang seperti ini. Pilih Ok.
Package configuration

  ┌─────────────────────────────┤ Configuring phpmyadmin ├─────────────────────────────┐
  │                                                                                    │
  │ An error occurred while installing the database:                                   │
  │                                                                                    │
  │ mysql said: ERROR 1045 (28000): Access denied for user 'root'@'localhost' (using   │
  │ password: NO) . Your options are:                                                  │
  │  * abort - Causes the operation to fail; you will need to downgrade,               │
  │    reinstall, reconfigure this package, or otherwise manually intervene            │
  │    to continue using it. This will usually also impact your ability to             │
  │    install other packages until the installation failure is resolved.              │
  │  * retry - Prompts once more with all the configuration questions                  │
  │    (including ones you may have missed due to the debconf priority                 │
  │    setting) and makes another attempt at performing the operation.                 │
  │  * retry (skip questions) - Immediately attempts the operation again,              │
  │    skipping all questions. This is normally useful only if you have                │
  │    solved the underlying problem since the time the error occurred.                │
  │                                                                                    │
  │                                       <Ok>                                         │
  │                                                                                    │
  └────────────────────────────────────────────────────────────────────────────────────┘
Pilih retry. Lalu Pilih Ok. Dan ulangi lagi proses diatas sekali lagi maka nanti akan berhasil.
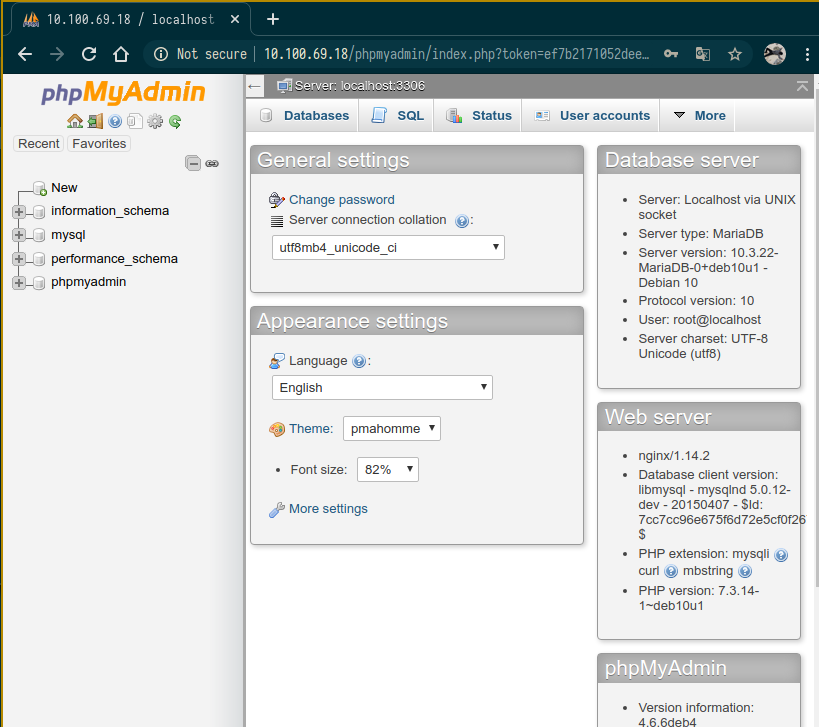
Setelah Reconfigure phpmyadmin selesai maka berikut merupakan tampilan phpMyadmin jika kita berhasil login menggunakan user root sehingga kita bisa melakukan pembuatan database berbeda jika kita login menggunakan user phpmyadmin yang tidak bisa membuat database.

Kita telah selesai menginstall MariaDB Server dan phpMyadmin pada Debian 10 menggunakan Nginx Web Server selanjutnya kamu bisa memulai menginstall CMS pada Server kamu. Semoga Postingan ini bermanfaat kurang dan lebihnya sama mohon maaf.
Zona Biner


