Tutorial Ubuntu 20.04 LTS : Cara Instalasi dan Konfigurasi NTP (Network Time Protocol) Server Menggunakan Chrony

Chrony merupakan implementasi serbaguna dari NTP (Network Time Protocol). Sama halnya dengan NTPd, Chrony merupakan aplikasi server yang juga sering digunakan untuk melakukan sinkronasi waktu. Pada postingan ini kita akan membuat NTP (Network Time Protocol) Server menggunakan Chrony pada Ubuntu 20.04 LTS.
Install
Sebelum mulai melakukan instalasi paket chrony lakukan update dan upgrade system terlebih dahulu.
Setelah itu lakukan instalasi Chrony dengan perintah berikut. Tunggu proses instalasi hingga selesai.
Config
Konfigurasi chrony terletak pada file /etc/chrony/chrony.conf. Kita lakukan sedikit konfigurasi pada file tersebut.
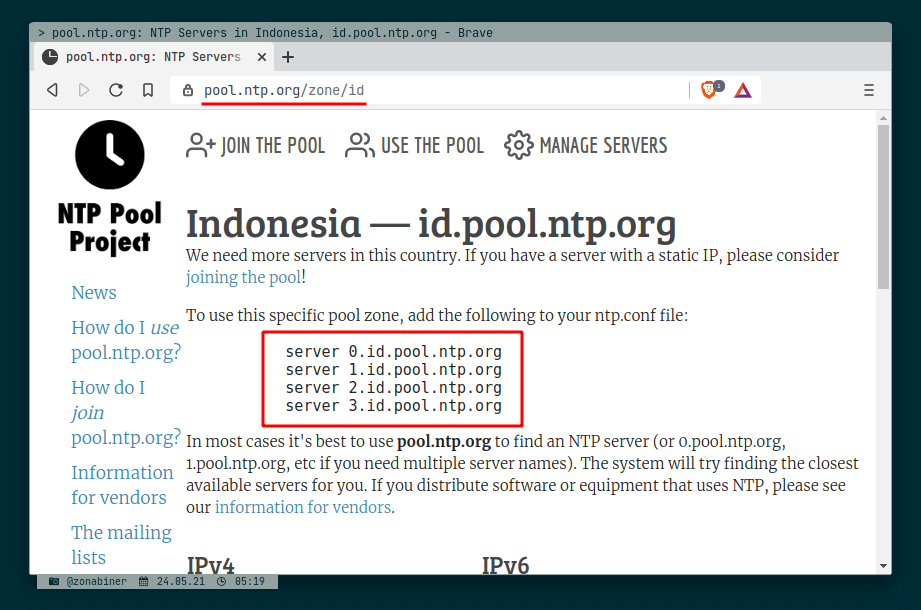
Lakukan disable pada pool default ubuntu. Caranya adalah dengan menambahkan tanda #. Kemudian tambahkan pool waktu yang di inginkan. Sebagai contoh disini kita akan menambahkan ntp pool dari Wilayah Indonesia.

# Welcome to the chrony configuration file. See chrony.conf(5) for more
# information about usuable directives.

# This will use (up to):
# - 4 sources from ntp.ubuntu.com which some are ipv6 enabled
# - 2 sources from 2.ubuntu.pool.ntp.org which is ipv6 enabled as well
# - 1 source from [01].ubuntu.pool.ntp.org each (ipv4 only atm)
# This means by default, up to 6 dual-stack and up to 2 additional IPv4-only
# sources will be used.
# At the same time it retains some protection against one of the entries being
# down (compare to just using one of the lines). See (LP: #1754358) for the
# discussion.
#
# About using servers from the NTP Pool Project in general see (LP: #104525).
# Approved by Ubuntu Technical Board on 2011-02-08.
# See http://www.pool.ntp.org/join.html for more information.
#pool ntp.ubuntu.com        iburst maxsources 4
#pool 0.ubuntu.pool.ntp.org iburst maxsources 1
#pool 1.ubuntu.pool.ntp.org iburst maxsources 1
#pool 2.ubuntu.pool.ntp.org iburst maxsources 2
server 0.id.pool.ntp.org
server 1.id.pool.ntp.org
server 2.id.pool.ntp.org
server 3.id.pool.ntp.org
Jangan lupa diakhir code kita tambahkan Network mana yang boleh untuk menggunakan NTP Server yang kita buat. Sebagai contoh karena Saya menggunakan LAN (Local Area Network) 10.1.1.0/24 maka saya cukup menambahkan allow 10.1.1.0/24. Jika kalian mempunyai lebih dari 1 LAN Network maka tinggal kita definisikan saja network yang diinginkan dibawahnya.
# Step the system clock instead of slewing it if the adjustment is larger than
# one second, but only in the first three clock updates.
makestep 1 3

allow 10.1.1.0/24
Jangan lupa lakukan save konfigurasi tersebut dan lakukan restart chrony service.
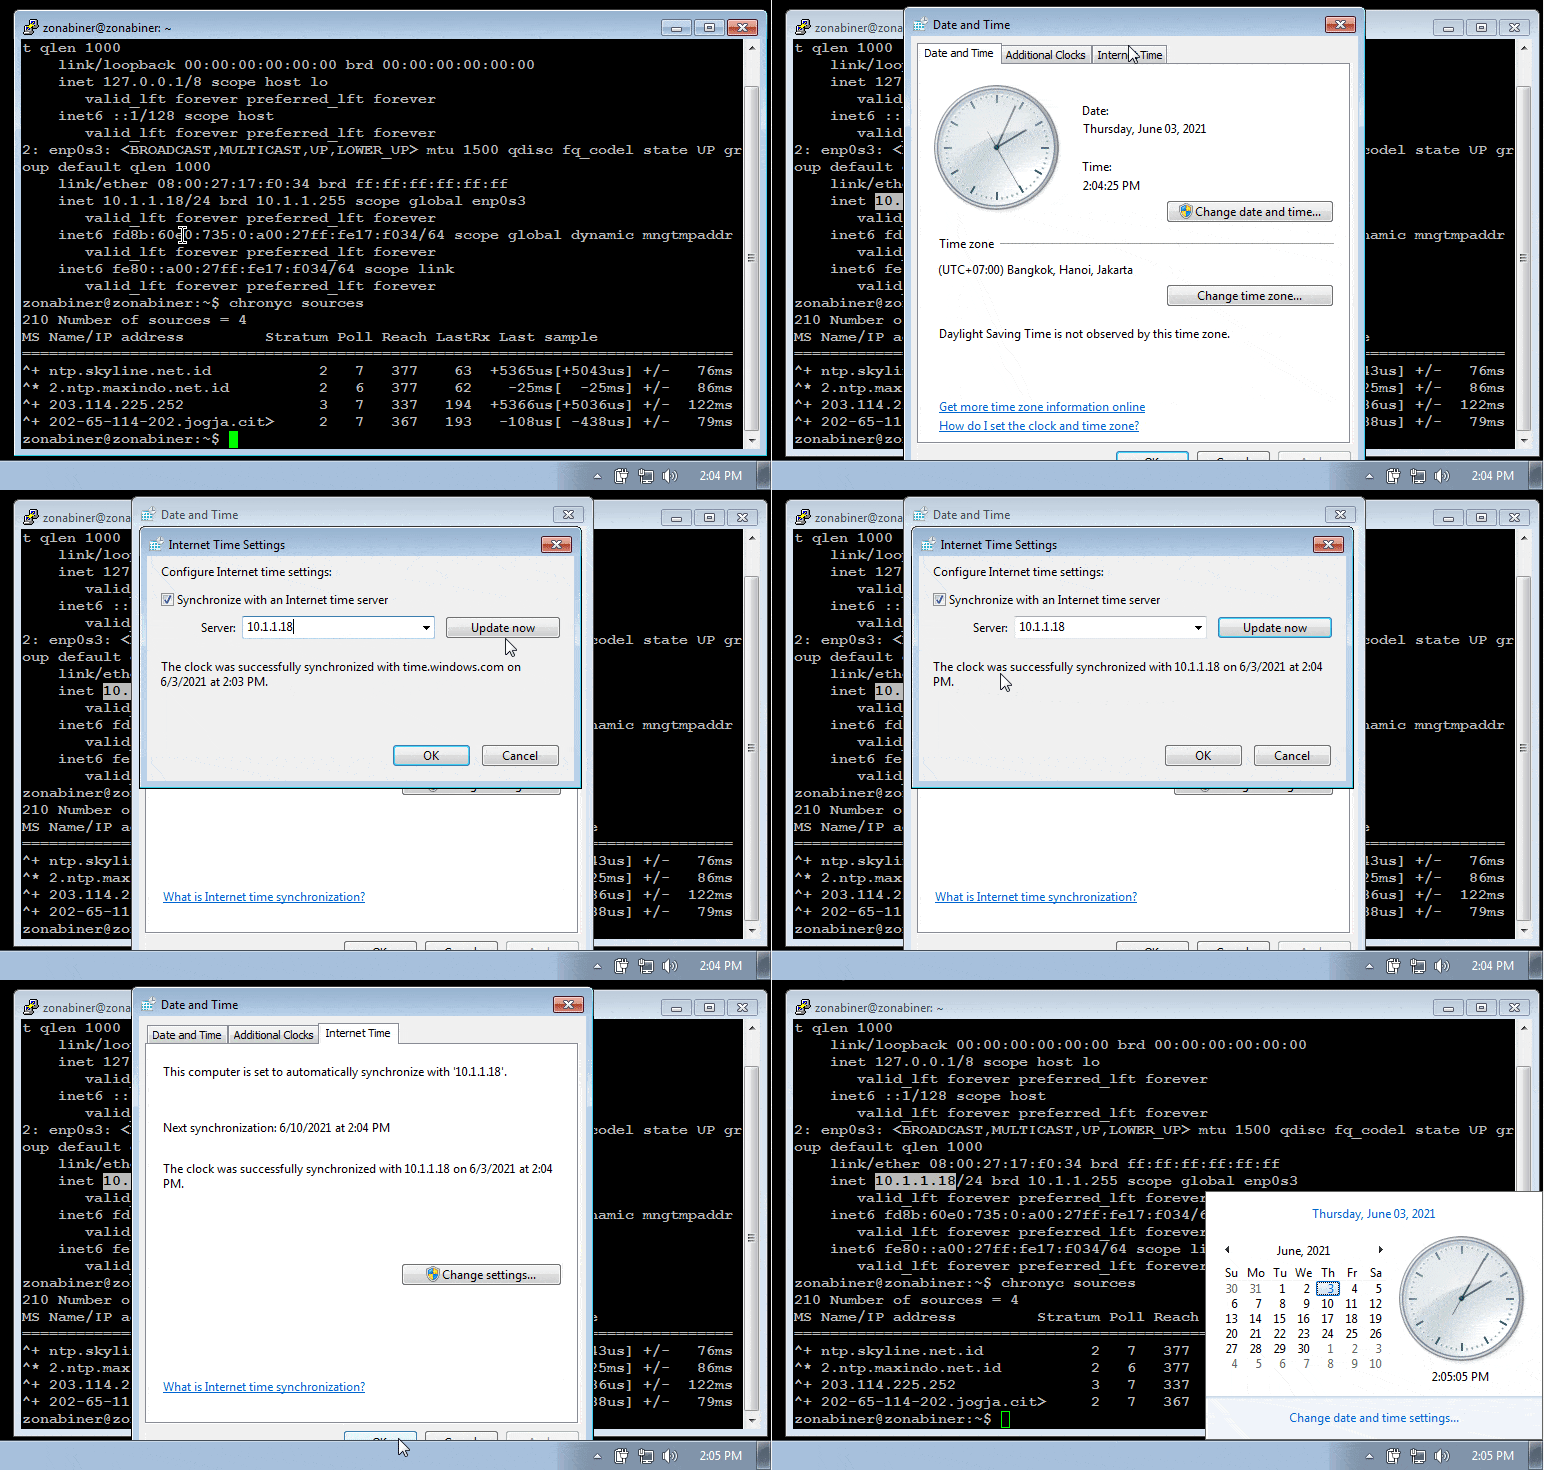
Untuk melakukan cek status ntp pool kita bisa gunakan perintah chronyc sources.
Pengujian
Pada Sistem Operasi Windows
Untuk melakukan sinkronasi waktu melalui NTP Client dengan menggunakan NTP Server yang kita buat adalah sebagai berikut.

Sampai disini kita sudah berhasil melakukan instalasi dan konfigurasi Chrony NTP (Network Time Protocol) Server pada Ubuntu 20.04 LTS. Happy Config! 😉


